Summer Mite Prevention: The 3-Week Coop Protocol to Stay Ahead of Infestations
Updated June 17, 2026 • By Celia Hatch
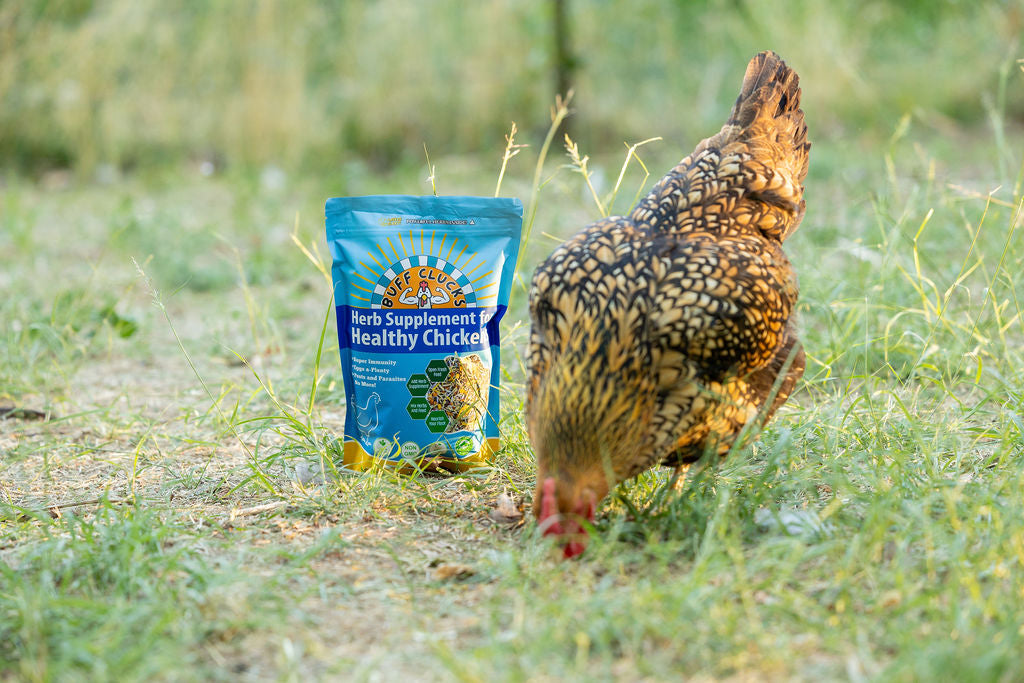
The short answer: Chicken mites explode in summer because warm temperatures compress their 14-day life cycle down to 7 days or less. By the time you see obvious signs of an infestation, populations are already large. The most effective approach is a 3-week proactive protocol using CoopShield across three application methods: dusted into bedding, loaded into the dust bath, and applied directly under feathers. Run it monthly through summer and you stay ahead of mites instead of chasing them.

Nobody wants to talk about mites until they have them. Then it is all they can think about. The clusters in the nesting boxes. The birds scratching relentlessly. The pale combs that should not be pale. The egg numbers that just quietly dropped and you are not sure why.
Mites are manageable. They are not a sign that you are a bad keeper. They are a sign that it is summer and you have chickens, which means mites will always be looking for an opportunity. This guide gives you a protocol to make sure they never find one.
In This Guide
Why Summer Is Mite Season
Mites are cold-blooded. Their reproductive rate is directly tied to temperature. Here is what that means in practice:
| Temperature | Mite Life Cycle | Population Doubling Time |
|---|---|---|
| Below 50 F | Dormant to very slow | Weeks to months |
| 68 F | About 14 days | 2 to 3 weeks |
| 86 F+ | As fast as 7 days | Less than 2 weeks |
A mite population that is barely noticeable on a cool May morning can be a serious infestation by the Fourth of July. This is not an exaggeration. A single mite can produce hundreds of offspring in a season under the right conditions.
The most common entry point: Wild birds. Sparrows, starlings, and other wild birds that land on your coop or visit feeders nearby carry mites. A single visit from an infested bird can introduce a new mite population. You cannot fully prevent this, but consistent environmental treatment makes the coop inhospitable enough that introduced mites do not survive to establish.
How to Spot Mites Before They Spread

A quick monthly inspection catches mites when populations are still small and easy to manage. Here is what to look for.
On the Birds
- Pale combs and wattles: Blood loss from mite feeding causes visible anemia. A comb that should be bright red looking pink or pale is a red flag.
- Feather loss not explained by molt: Particularly around the vent, under wings, and at the neck.
- Visible mites or eggs: Part the feathers around the vent and under wings. Red mites look like tiny moving red or gray specks. Northern fowl mite eggs appear as white to gray clusters glued to feather shafts close to the skin.
- Excessive scratching and preening: More than normal, especially focused on the same spots repeatedly.
- Restlessness at night: Red mites feed at night. Birds that cannot settle on the roost may be reacting to feeding mites.
In the Coop
- Check roost bar joints at night with a flashlight: Red mites hide in crevices during the day and emerge at night to feed. They look like tiny moving red or brown specks in the joints and cracks of roost bars.
- Red or black streaks in nesting box crevices: Mite feces and crushed mites leave dark streaks in crevice hiding spots.
- Run a white cloth along roost bars: If mites are present in high numbers, red smears will appear on the cloth from crushed feeding mites.
For a full breakdown of identifying which pest you are dealing with, see our guide to mites vs. lice.
What CoopShield Contains and Why Each Ingredient Matters
CoopShield combines four ingredients that attack the mite problem from different angles simultaneously. Using multiple mechanisms prevents mites from adapting to any single approach.
| Ingredient | How It Works | Target |
|---|---|---|
| Diatomaceous Earth | Physically punctures mite exoskeletons, causing dehydration and death | Adult mites on contact |
| Neem | Azadirachtin disrupts mite reproduction, molting, and larval development | Mite reproduction cycle |
| Chrysanthemum | Natural pyrethrins affect mite nervous systems on contact | Adult and nymph mites |
| Peppermint | Volatile menthol compounds repel mites and flies by disrupting navigation pheromones | Repellent, environmental deterrent |
Why the combination matters: Diatomaceous earth alone kills adult mites on contact but does nothing to the eggs or larvae developing in crevices. Neem alone disrupts reproduction but works slowly. Chrysanthemum knocks down adults quickly. Peppermint reduces new mites arriving in the environment. Each ingredient covers what the others miss.
The 3-Week CoopShield Protocol
This protocol is designed for monthly summer prevention. Run it once a month from May through September and you stay ahead of mite season instead of reacting to it. If you are dealing with an active infestation, see the section below for the accelerated approach.
Week 1: Full Coop Treatment + Direct Bird Application
- Remove all bedding from the coop.
- Apply CoopShield generously to every crevice, joint, roost bar surface, and nesting box interior. Focus on the hiding spots where red mites shelter during the day: joints, cracks, the underside of roost bars, and the corners of nesting boxes.
- Replace with fresh, dry bedding and dust the surface lightly with CoopShield.
- Handle each bird and apply CoopShield directly under feathers: vent area, under wings, and around the neck. These are the three zones where mites concentrate on the body.
Week 2: Reinforce the Dust Bath
- Add a generous layer of CoopShield to the dust bath area.
- Chickens will self-apply during their daily dust bathing routine, working the powder into their feathers and skin naturally.
- Do a quick visual check of roost bars and nesting box crevices. Spot-treat any areas showing mite activity.
Week 3: Maintenance Check
- Light application to bedding surface, nesting boxes, and roost bars.
- Quick bird inspection: check under wings and around the vent on a few birds.
- If all clear: move to monthly maintenance schedule and repeat Week 1 next month.
- If mites are still present: repeat the full Week 1 treatment and continue weekly checks.
The 3 Application Methods

CoopShield works through three distinct application methods. Using all three simultaneously is what makes the protocol effective. Any single method alone leaves gaps.
Method 1: Dust Into Bedding
Sprinkle CoopShield across the surface of coop bedding after each full cleanout and as a light maintenance layer between cleanouts. Mites traveling across the coop floor encounter the powder. The diatomaceous earth works on contact. The peppermint and neem compounds create an inhospitable chemical environment that deters settlement.
Method 2: Load the Dust Bath
This is the most passive and efficient application method. Chickens dust bathe daily as natural pest-control self-care. Adding CoopShield to the dust bath turns that existing behavior into an ongoing mite treatment. The birds do the work for you. Make sure the dust bath area is accessible, sheltered from rain, and replenished after it gets depleted or wet.
Method 3: Apply Directly Under Feathers
This is the direct bird treatment. Part the feathers at the vent, under each wing, and around the neck. Dust CoopShield into these areas where mites concentrate and where standard environmental treatment does not reach. Do this for every bird during the Week 1 reset and anytime you find active mites on birds during inspections.
Important: Avoid applying diatomaceous earth near the eyes or nostrils of birds. Fine dust in the respiratory tract causes irritation. Apply to feathered areas only, and do it outdoors or in a well-ventilated space.
If You Already Have an Active Infestation
If you are already dealing with a visible mite problem, the protocol above still applies, but compressed into a shorter timeline with higher frequency.
- Day 1: Full coop cleanout. Strip all bedding. Apply CoopShield to every surface, crevice, and roost bar. Treat every bird directly under feathers at vent, wings, and neck.
- Day 3 to 4: Check roost bars at night. Spot-treat any visible mite clusters. Reapply to dust bath.
- Day 7 to 10: Second full coop treatment and direct bird application. This is critical: mite eggs that survived the first treatment hatch within 7 to 10 days. A second application at this window catches the newly hatched nymphs before they reach reproductive age.
- Day 14 to 21: Maintenance check. If population is controlled, move to monthly prevention schedule. If still active, repeat the Day 1 treatment.
For more on identifying exactly what type of mite or parasite you are dealing with, see our guide to diatomaceous earth for backyard chickens and depluming mites.
Year-Round Prevention Habits That Actually Help
- Quarantine new birds for 2 to 4 weeks before introducing them to your flock. Inspect and treat preemptively before the quarantine ends.
- Discourage wild birds from roosting on or near the coop. Move feeders away from the coop structure.
- Keep the coop dry. Moisture creates ideal mite habitat. Good ventilation and prompt bedding replacement after wet weather reduce mite survival rates.
- Minimize crevices. When building or repairing your coop, seal cracks and gaps where red mites hide during the day. Fewer hiding spots means lower carrying capacity for mite populations.
- Monthly inspections. A 5-minute check of birds and coop at night catches infestations while they are still small and manageable.
Summer Mite Prevention Routine
- CoopShield monthly: dust bedding, load dust bath, apply under feathers on each bird
- Full coop cleanout with CoopShield treatment at the start of each month May through September
- Night inspection of roost bars monthly with a flashlight
- Quarantine all new birds before flock introduction
Frequently Asked Questions: Chicken Mite Prevention
What are chicken mites?
Chicken mites are tiny arachnids that feed on the blood of chickens. Red mites hide in the coop during the day and feed at night. Northern fowl mites live directly on the bird at all times. Both cause anemia, feather loss, and egg production drops if untreated.
Why are chicken mites worse in summer?
Mites reproduce faster in warm conditions. At 86 degrees or above, their life cycle compresses to 7 days. A small spring population can become a full infestation within weeks during summer heat. Prevention before populations build is the only practical approach.
What does CoopShield contain and how does it work?
CoopShield contains diatomaceous earth (physically damages mite exoskeletons), Neem (disrupts mite reproduction via azadirachtin), Chrysanthemum (natural pyrethrins affect mite nervous systems), and Peppermint (repels mites and flies through volatile compounds). The four-ingredient combination attacks mites at multiple life stages simultaneously.
How do I know if my chickens have mites?
Look for pale combs, sudden feather loss around the vent or under wings, excessive scratching, restlessness at night, and visible specks on birds or in coop crevices. Check under wings and around the vent monthly. Inspect roost bar joints at night with a flashlight for red mites.
How often should I apply CoopShield?
Monthly maintenance through summer: full coop treatment plus direct bird application in week 1, dust bath loading in week 2, maintenance check in week 3. For active infestations, run the full treatment every 7 to 10 days until clear.
Can I apply CoopShield directly to my chickens?
Yes. Dust under feathers at the vent, under wings, and around the neck. Avoid eyes and nostrils. Apply outdoors or in good ventilation. These are the zones where mites concentrate on the bird.
What is the difference between mites and lice on chickens?
Mites are arachnids that feed on blood. Lice are insects that feed on feather debris and skin scales. Mite eggs are loose or in coop crevices. Lice eggs appear as white clusters glued to feather shafts. Both cause irritation and production drops. Treatment approaches overlap significantly.
Do dust baths prevent mites?
Yes. Dust bathing is a chicken's natural mite control mechanism. Adding CoopShield to the dust bath supercharges this natural behavior with diatomaceous earth and botanical compounds, turning the daily self-maintenance routine into active mite prevention.
What attracts mites to a chicken coop?
Warm temperatures, moisture, crevices to hide in, and the presence of birds. Wild birds visiting feeders or perching on the coop are the most common mite introduction source. New birds added without quarantine are another common entry point.
How long does a mite infestation take to resolve?
With a consistent protocol, most infestations show significant improvement in 2 to 3 weeks. The key is treating birds and coop simultaneously and repeating at day 7 to 10 to catch newly hatched mites from eggs that survived the first treatment.
Can mites kill chickens?
Yes, in severe cases. Heavy infestations cause significant blood loss leading to fatal anemia, especially in young or weakened birds. Even non-fatal infestations cause chronic stress, production losses, and increased disease susceptibility. Early prevention is far easier than treating a heavy infestation.
Should I quarantine new birds to prevent mites?
Always. Quarantine new birds for 2 to 4 weeks before introducing them to your flock. Inspect and treat preemptively before quarantine ends. This single practice prevents most new mite introductions into established flocks.